At Home With The Hinsons
Showing posts with label Christmas Decor. Show all posts

Tuesday, December 22, 2009

*Sparkly* Christmas Ornaments

Good morning all and Merry CHRISTmas!
Today the Hinsons will be celebrating CHRISTmas with Nanny & Op.
Then tonight we'll have our CHRISTmas service at church.
James will be a wise man, and Joseph is reading.
Which reminds me of a funny story on Joseph.
When he was little, just as he was learning how to read he opened every Christmas gift like this...
Me: Joseph, read the card, who's it from?
Joseph: Love, Nanny & Op!
The look on my Grandpa's face was priceless.
He thought it was hilarious to be receiving all the credit from everyone else's gifts!


Before the day got away from me I wanted to share my latest crafty creation.
I encourage you to visit the Cricut blog for the real tutorial.

Needed supplies:
Saran Wrap
Glass decorative ornaments
Pledge with the blue top
Fine glitter
Ribbon

Start by taking the top off of your ornament.
It just so happens I had a house full of boys to help me. :)

Fill your ornament 1/4 full with the Pledge.
Place the Saran wrap on top and shake it up!

Pour out the extra Pledge solution.
Take your funnel and pour in the fine glitter color of your choice.
We used about 2 teaspoons of glitter.
Note: You must use the fine glitter, regular glitter will only clump.
Trust me, I know.

Now take a new piece of Saran wrap and place it over the top.

Shake it, shake it, shake it. :)

Once you've shaken it like a polaroid picture for several minutes your done.
Wipe off the top with a paper towel.
Then pop your ornament top back in place.
Tie somewhat coordinating ribbon on the hanger.
And finish it off with a sticker of your choice.
OR, if your trying this after Christmas,
AND Santa brought you a Cricut machine,
you could finish it off with a vinyl monogram.
But, that's just a thought. ;>

Have your willing models smile with their ornaments by the tree.
Great job boys!!!

Mama's ornament, Silver with blingy mistletoe.
James' ornament, Blue with Christmas tree on one side and a cross on the other side.
Joseph's ornament, Green with mistletoe on one side and a cross on the other side.
Joshua's ornament, Red with a manly cross.
So do tell, what do you think?

Thanks boys for indulging me a little.
You proved to be very good sports. :)

Now that I've done a little Martha this season,
I'm planning to spend the rest of my days at the feet of Jesus,
like Mary.
Tomorrow we celebrate the birth of our savior!

God's blessings on your day friends, Sarah :D

Thursday, December 17, 2009

Christmas Card Display

Hi all!
I spent Thursday doing my Mama-work.
It was fabulous to be without anybody home sick.
We've been passing around a stomach virus for the past week.
Gross!

After getting several things checked of my To Do list it was time for my afternoon appointment.
Hair appointment that is.
Nothing makes a girl smile like new hair! :)

After coming home with a fresh new attitude I decided to tackle several projects.
One of the things riding my to do list was coming up with some type of Christmas card display.
In the past I've taped them up, as tastefully as possible of course.
But this year I was over that.

While searching out a solution, these caught my eye.

But alas, Pottery Barn's price tag didn't quite fit my budget.

Since I was hoping for something along the lines of
F-R-E-E
I chose to recreate a project I'd seen online.
Surprise, I know. ;>

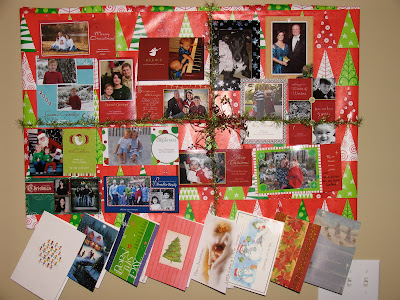
I started with a bulletin board that was sitting in the corner of my office.

I wrapped it in wrapping paper.
It's fundraiser paper so it's thick and textured.
LOVE it!

I secured the paper with tape on the back.
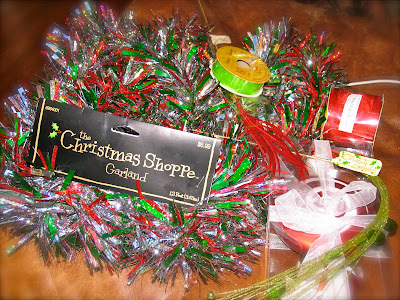
Then I used my glittery green tinsel like gift wrap ribbon.
Yep, it got the Scotch tape treatment too.

Once I flipped it over I knew it still needed a little something.
So I made a bow with red and green sparkly wire.
Ah, now I'm liking what I'm seeing!

Time to add on the Christmas cards we've received so far this year.
And there you have it,
my free and fun Christmas Card Display. :)

So do tell,
what do you think?

God's blessings on your evening! Sarah :D

Wednesday, December 9, 2009

Oh Christmas Tree

HOORAY,
After letting the tree settle for a week and a half
we finally did it, the ornaments are on!!!


Thanks boys for all your help. :)

And on a side note,
our first 100 Christmas cards went out his morning,
HOORAY #2!!!
I do have a few more to send out over the next couple of days.

Christmas is on it's way and all our traditions are falling into place.
Whew, just in time. ;>

I hope your Christmas is coming along as well.
So I'm wondering, what's your least favorite holiday chore?? :>

God's blessings on your night friends, Sarah :D

Tuesday, December 8, 2009

Ribbon Ornament Tutorial

Hi all!
I was so excited to hear about the 12 Days of Handmade Ornaments
and absolutely flattered to post a tutorial.
Thank you so much for inviting me over Kristin!

I first saw these ribbon ornaments at The Untraditional Topiary.
I loved the idea and had to give them a try.

I started with styrofoam balls.
I purchased the smooth styrofoam to keep them from shedding.
They worked perfect with the sequins push pins I used.

Next I pulled out my ribbon stash.
I stock up on ribbon whenever it's on sale.

After choosing my ribbon I cut 4-5 inch strips.

Now it's time for the fun to begin!
I started with my first color of ribbon.
Take the ribbon loop and secure it with your straight pins.
I used one pin for the narrow and two for the wider width.

To make the ornament hanger,
I used a longer ribbon strip and secured it with tons of straight pins.

Keep adding ribbon,
the more the better!

Then bling it out a little by adding some fun tinsel. :)

When you think you're through hang it on the tree and admire your mad skills.

So do tell, what do you think??

God's blessings on your day sweet friends, Sarah :D

Sunday, November 29, 2009

Christmas Decor And More

Hi all, I hope this finds you rested and ready for a new week.
We've eaten all the leftovers and pulled out all the Christmas decor.
And still managed to sleep late or nap, every day.
A girl's gotta have her priorities.

This year I'm taking time to go through every single decoration we own.
Sure it's slowing my progress but so worth it!
Each item is put into one of three categories...
1. Perfect as is, ready to go... this pile is slim. :)
2. Keeper that needs a little update... sentimental ornaments that will be updated by removing their stale hooks and hanging them with ribbon.
3. Unnecessary or out of date decorations... these are going in the yard sale boxes.

While my ornament sorting is still a work in progress,
the tree was looking lonely.
Andy did his part by putting the bubble lights on.
Bubble lights are my favorite!
Now it was my turn.
Remember this shopping trip to Hob Lob and all the goodies I scored?

Since my out of date tree topper was in the yard sale box.
R.I.P mauve and cream Santa!
It was time to put those supplies to good use.
With a little work I made this...

I'm calling this Seuss inspired crafty creation,
the True Meaning of Christmas Tree Topper.

I love how completely over the top it is.
Fun & colorful!
So tell me, what do you think?
God's blessings on your night, Sarah :D

Ribbon Ornaments

Hi all!
With the tree going up I have ornaments on the brain.
So I thought now was the perfect time to try my hand at these...

Mmhh yes, beautiful!
Since I was without a tutorial I did what any good crafter does,
I made it up as I went. :>
I used the smooth styrofoam balls, flat sequin pins, and tons of ribbon.
I can't lie, this was not a fast project.
Once I got going it took about 2 hours.
If this weren't a gift for my mother-in-law I would have abandoned the project midway.
But it was, so I didn't.
And I'm so glad I stuck with it.
So without further ado I give you my very first ribbon ball. :)

Thanks Rach for introducing me to Shelley's website.
If any of you crafty gals make your own I'd love to see pics!
God's blessings on your day, Sarah :D